Laser Engraving Scrabble Wall Tiles with a Snapmaker
With Valentine's Day coming up, I wanted to make Priscilla something handmade, that she'd appreciate, and that wouldn't be prohibitively expensive to make. Recently, I had been making a lot of prints with my 3D printer but realized that despite having my Snapmaker for a few years now, I've predominately used it as a 3D printer and only tried out the CNC functionality once but I had never used the laser etching/engraving module.
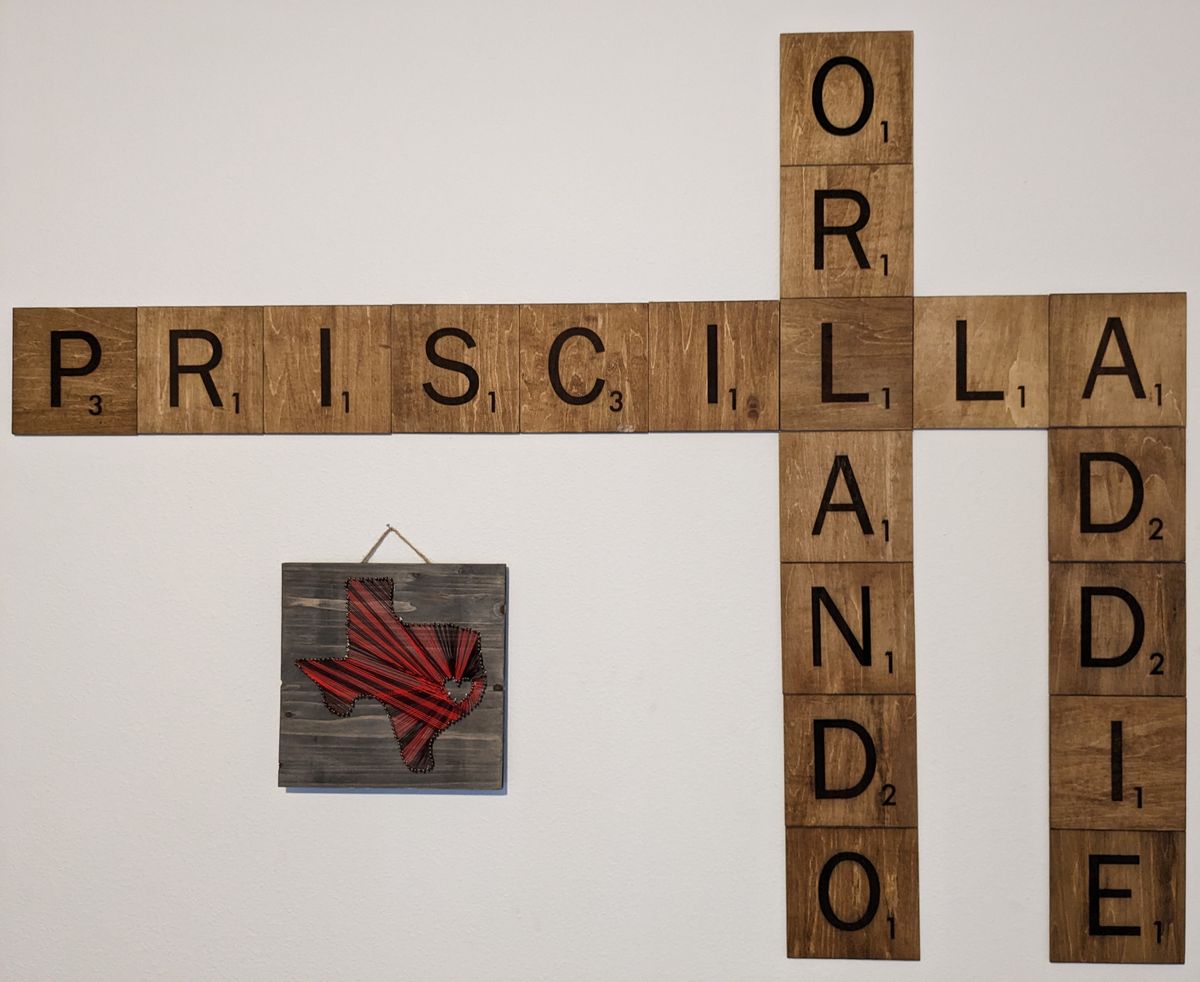
Priscilla and I had recently gotten into playing the occasional game of Scrabble and I thought that making decorative tiles of our names to hang up would be something she'd like and would also be a nice entry level project for someone who had never laser engraved anything before. The end result (seen above) came out really nicely, looks great on our living room wall, and was a hit for a Valentine's Day gift.
If you'd like to make something similar, I've written up my process here.
What You'll Need
- A laser engraver/cutter (I used my Snapmaker 2.0 A350)
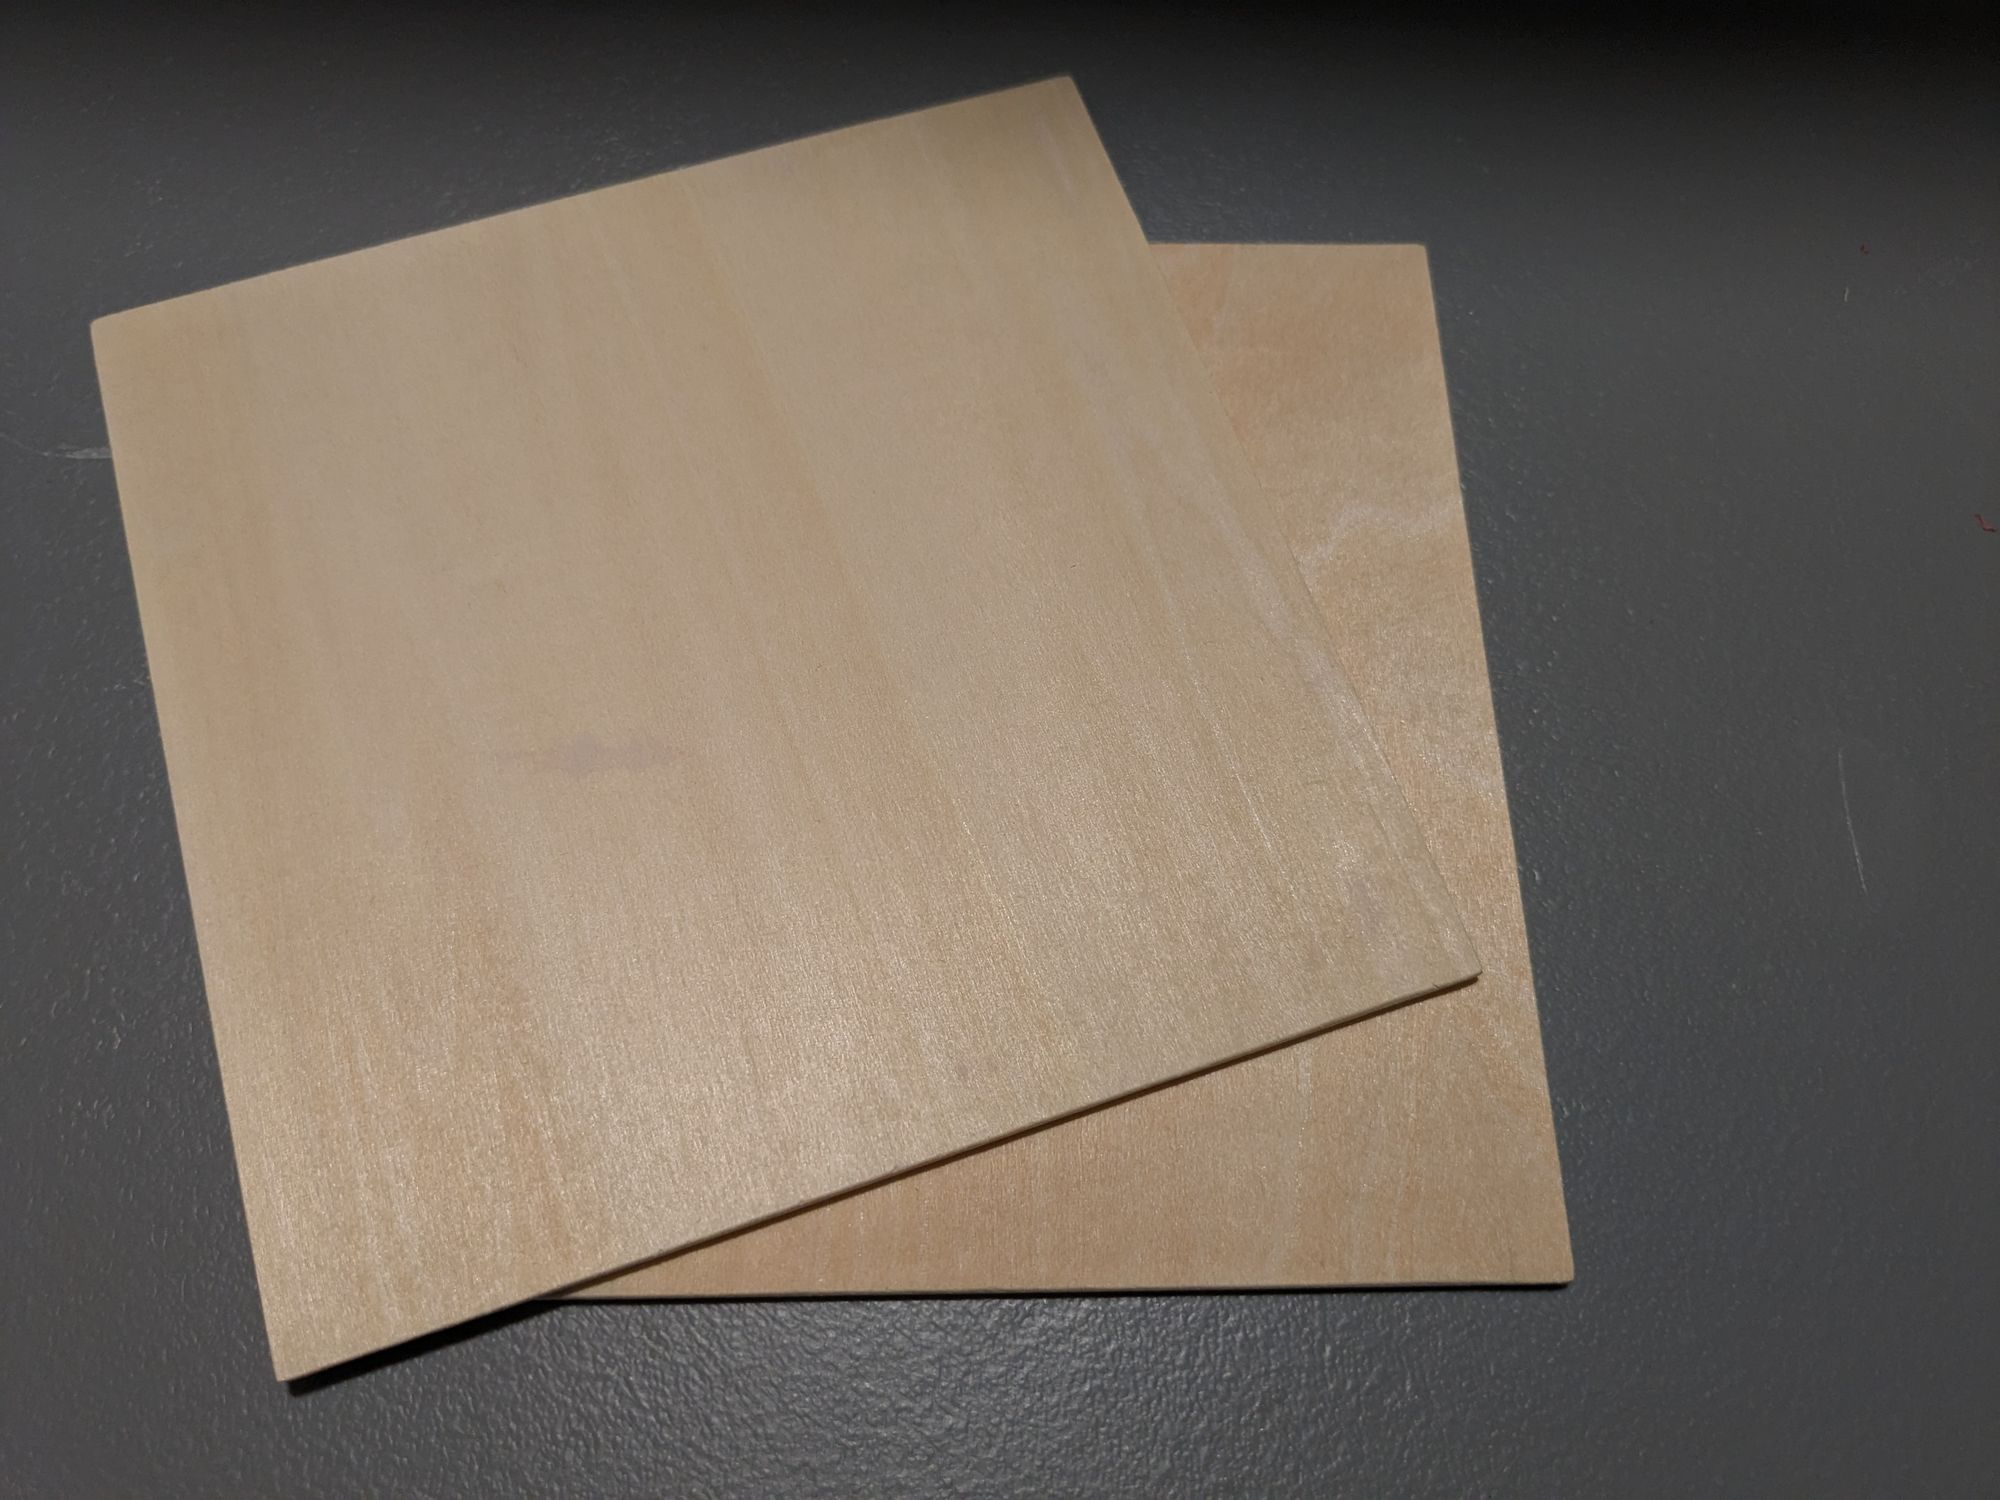
- 6x6 Inch Unfinished Basswood Tiles (1 for each letter you'd like to make)
- Scrabble Letter Tile Templates from Paper Trail Design
- 1 Pint All In One Wood Stain (I used Watco's Danish Oil in Dark Walnut)
Step One - Prep Your Tiles
Count out the basswood tiles you'll need. If you want more flexibility, you can do one for each letter so you can always change the layout later. If you know how you'd like to arrange your tiles, you can omit the duplicate letters.
Get the scrabble letter tile images you need from Paper Trail Design's website. You'll want the ones with a white background. This will make engraving easier later on.
Step Two - Setup Your Workspace in Luban
Next we will need to make sure Snapmaker Luban (Snapmaker's software) is all set to accept the images to get them ready for engraving on our basswood tiles. Open Snapmaker Luban and on the Get Started Dashboard, you'll want to hover over 'Laser' and click on 3-axis.
The 'Job Setup' box will appear and this is where you'll setup your workspace with the dimensions of your tiles.
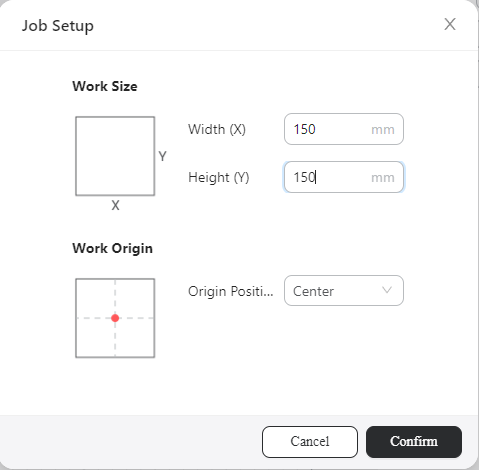
If you are using the same basswood tiles I did, you'll want it to be 150mm x 150mm. If you are using smaller or larger tiles, adjust the numbers appropriately.
I also had my 'Origin Position' in the center because I thought it made it easier to place the tiles.
Step Three - Setup Letters in Luban
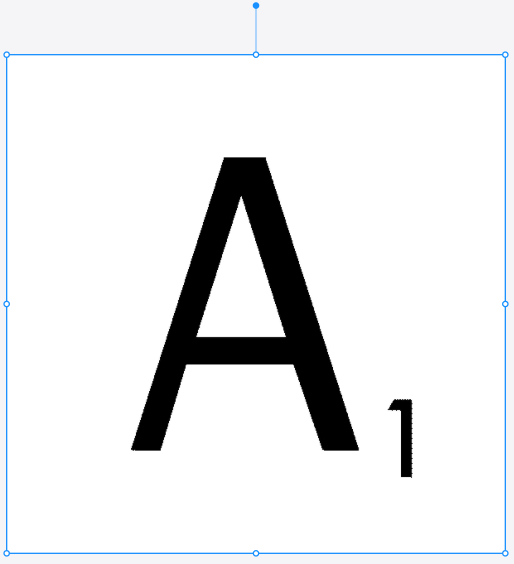
Import the file for the first tile you'd like to engrave and stretch it so it fills the entire workspace. The letter files are square and so is the workspace so this is just making sure all four corners match up like so:
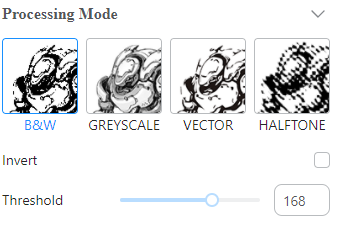
You'll notice that it isn't as crisp of an image. This is because Luban defaults to processing the image in 'Greyscale.' This may be great for an image where you need more detail like an actual photo but for something that just has a single color of black, you should change the 'Processing Mode' to 'B&W' to ensure a good contrast when your laser engraves the tile. I used the default value of 168 but you can play around with the value and see if you like the previewed results better.
Step Four - Create Toolpath in Luban
Next, you'll have to create a toolpath for the letter. The toolpath is what tells the laser module where to go, how strong the laser is, how long to let the laser linger, etc.
With the image selected, go to the right hand side where it says, 'Process' and click on 'Create Toolpath.'
Under ' Preset,' make sure to change it to 'Line-filled Engraving.'
I used the default settings for the preset as shown below but in case they have changed in future versions of Luban, they are shown below:
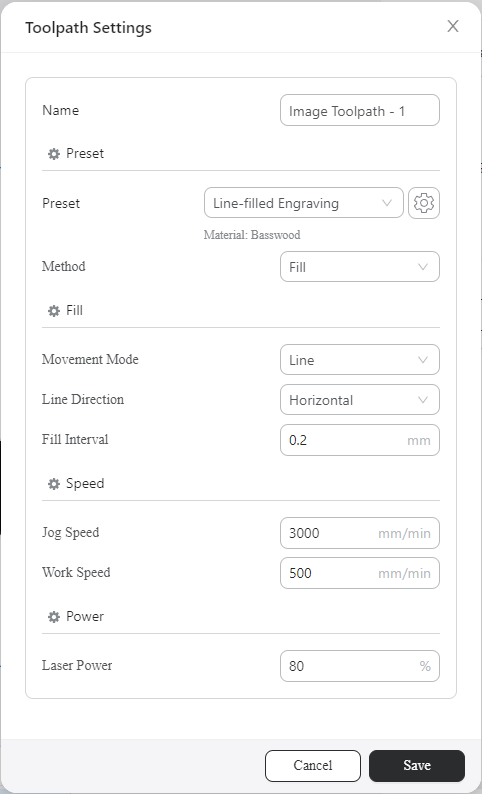
I tried tinkering with these settings to learn a bit more but ultimately found that the presets worked for my needs. If you'd like to see how the settings change the look of your engraving, you can try experimenting on a scrap piece of basswood.
Depending on the letter, changing the line direction from 'Horizontal' to 'Vertical' may save a few minutes off of the engraving time but at ~25 minutes or less for each tile, I wasn't too interested in spending tons of time optimizing for something that wasn't going to be a big issue.
Hypothetically, if you were going to make this a reoccuring job, that may be something you'd be interested in.
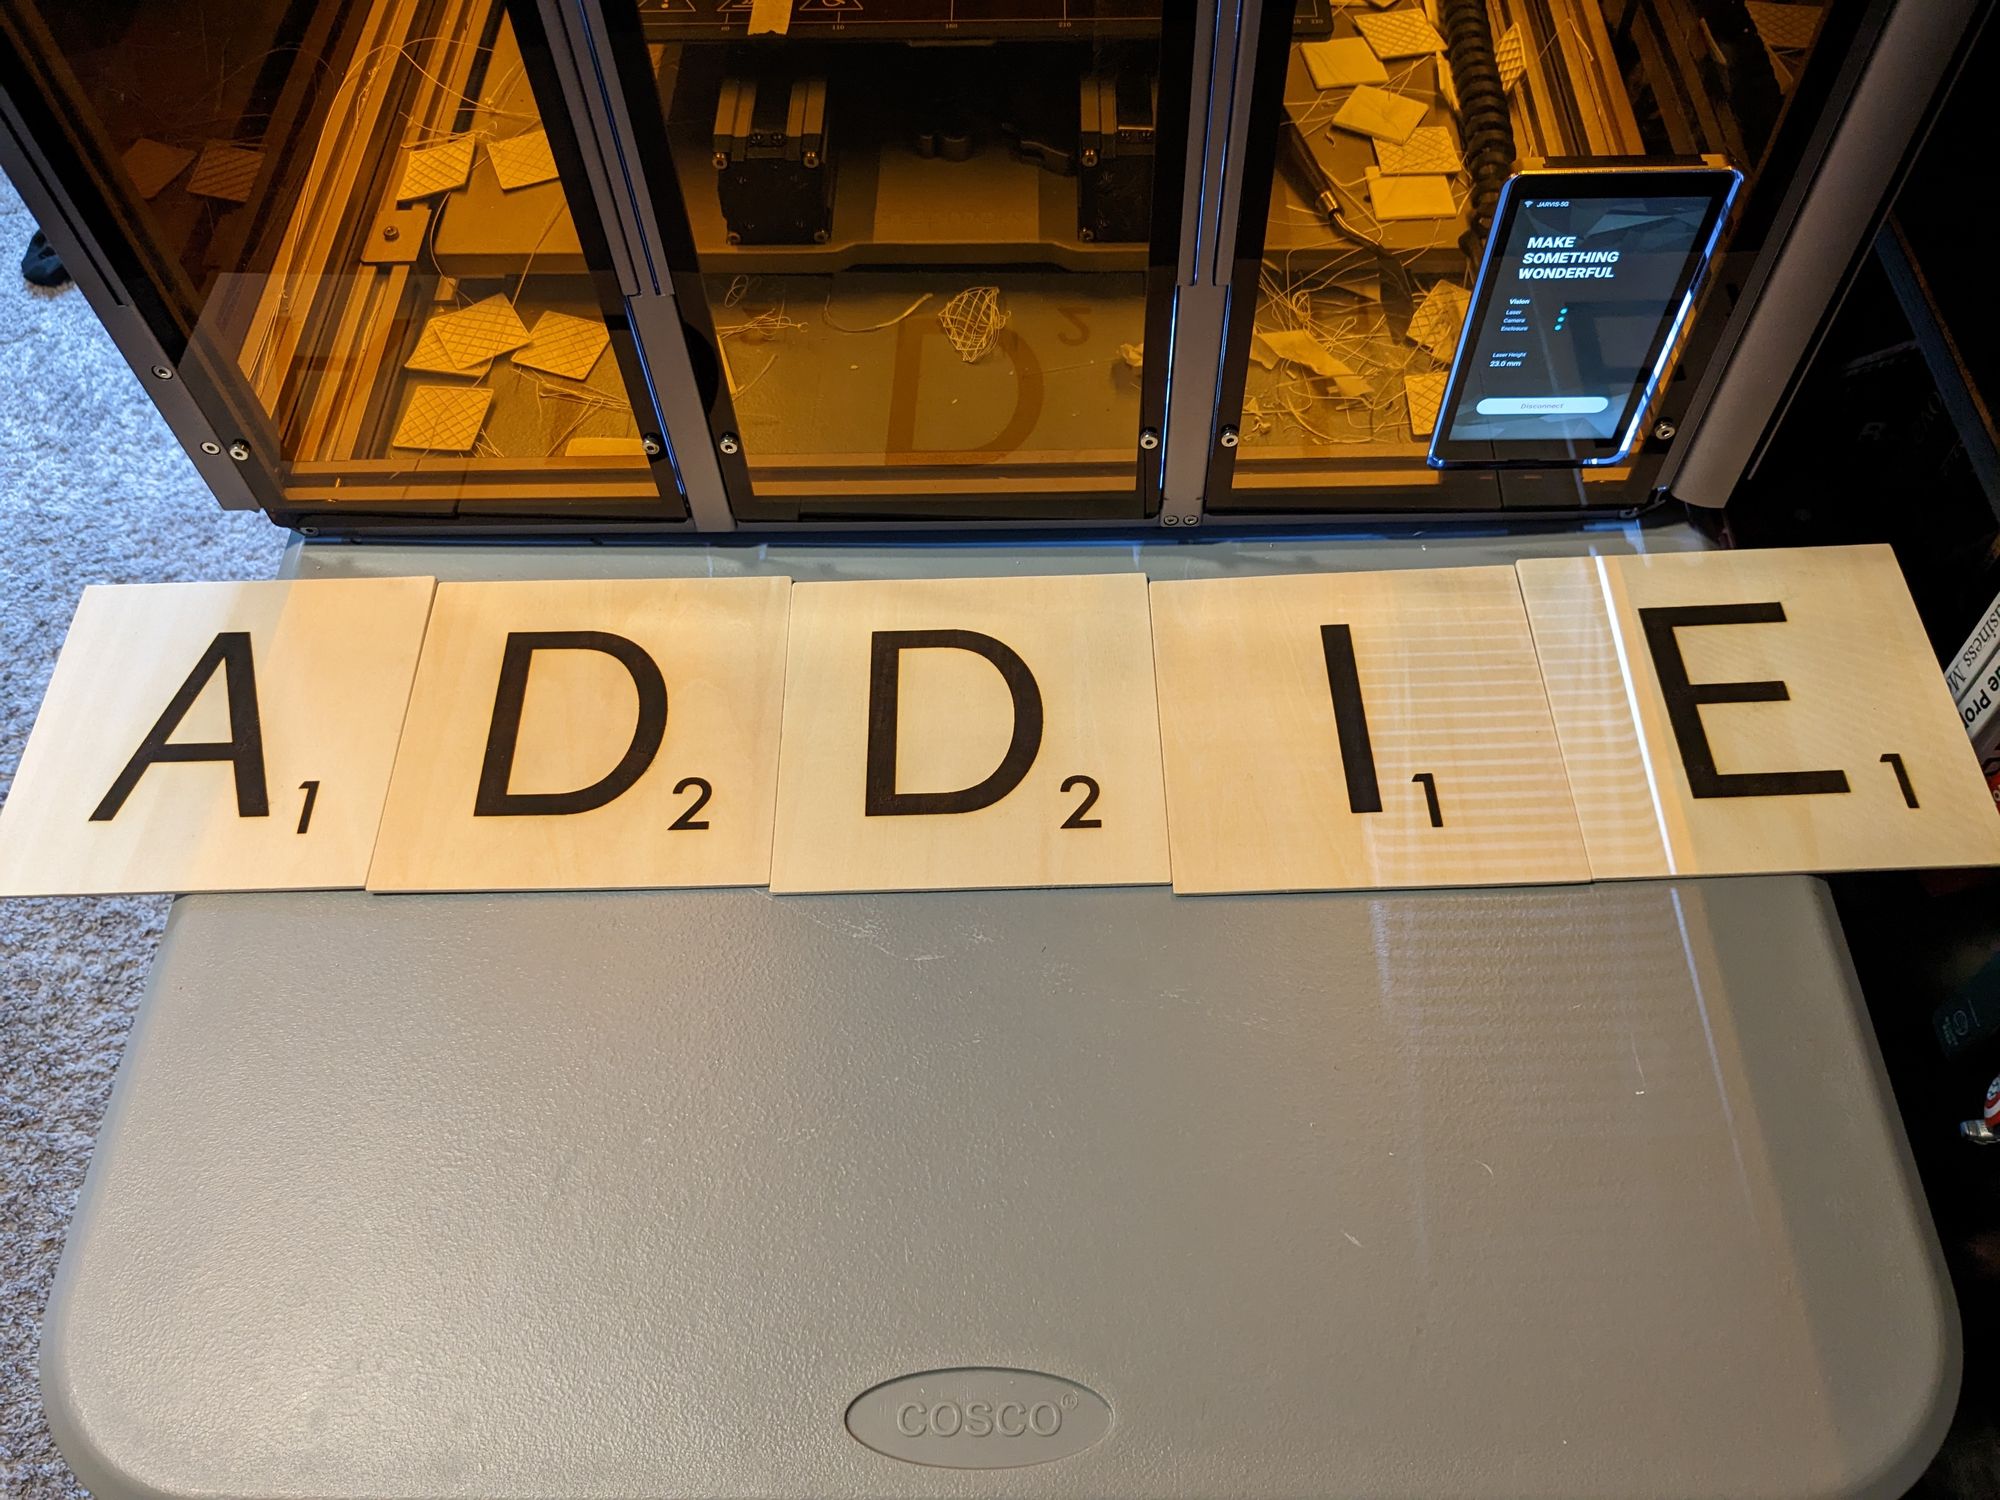
Step Five - Engrave Tiles
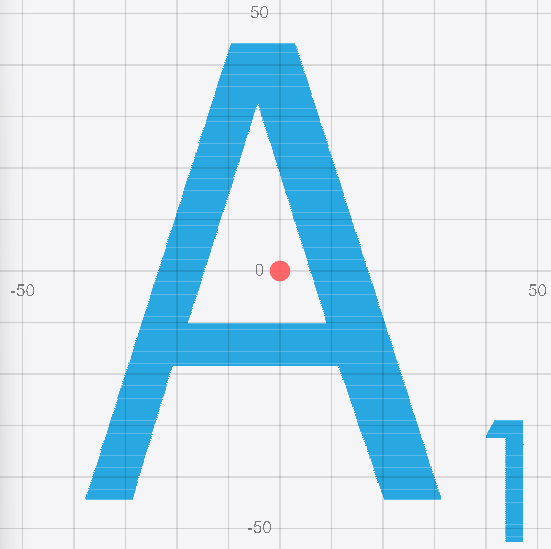
Once you've finalized the settings for your toolpath, click 'Generate G-code and Preview.' Your workspace should now be made up of lots of thin blue lines. This represents the path that the laser is going to take as it engraves your letter.
After the toolpath and preview is successfully generated, you can click on 'Export' and choose either 'Load G-code to Workspace' or 'Export G-code to File.'
If you have connected your Snapmaker to your computer via the built in Wi-Fi, you can load it to the workspace. If not, it may be easier to export it to a file and upload the G-code to the Snapmaker via a USB flash drive.
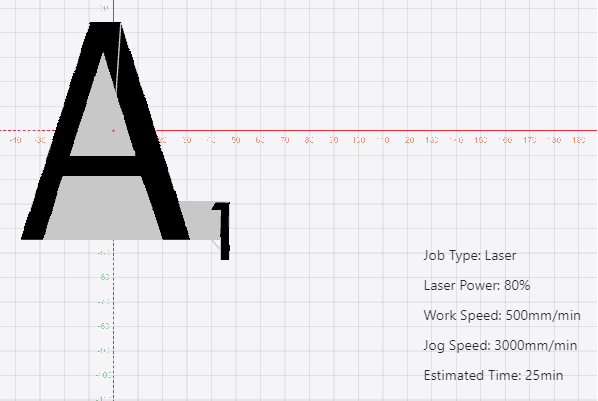
In my case, when I loaded it to the workspace, it showed me the toolpath of the laser, including when it was moving but not engraving (shown in gray below) as well as the time the job would take.
Once the G-code is loaded to the workspace, make sure your tile is loaded on the Snapmaker bed. Be sure to place it in the right spot. When you calibrated your laser module, you should have set the work origin. Make sure that the work origin matches your setting from Step Two. If you are unsure, you can jog the laser module into the correct position relative to your basswood tile and click on 'Set Work Origin' under 'Control' on the right hand side of the workspace in Snapmaker Luban.

After ensuring your work origin is properly set, you can run the G-code from the flash drive or if your Snapmaker is connected, you can click on 'Start on Luban' and the laser will engrave your tile!
Step Six - Repeat Steps 3-5 For Each Letter
Repeat Steps Three through Five for each letter you want to engrave. With an average letter taking ~20 minutes or so, you can space out your jobs to line up when you are able to swap out the tiles and can keep an eye on the laser module in case anything happens.
Step Seven - Stain
After your letters are all engraved, it's time to stain them! Head to a well ventilated work area where you can safely work and leave the tiles to dry when you are done.
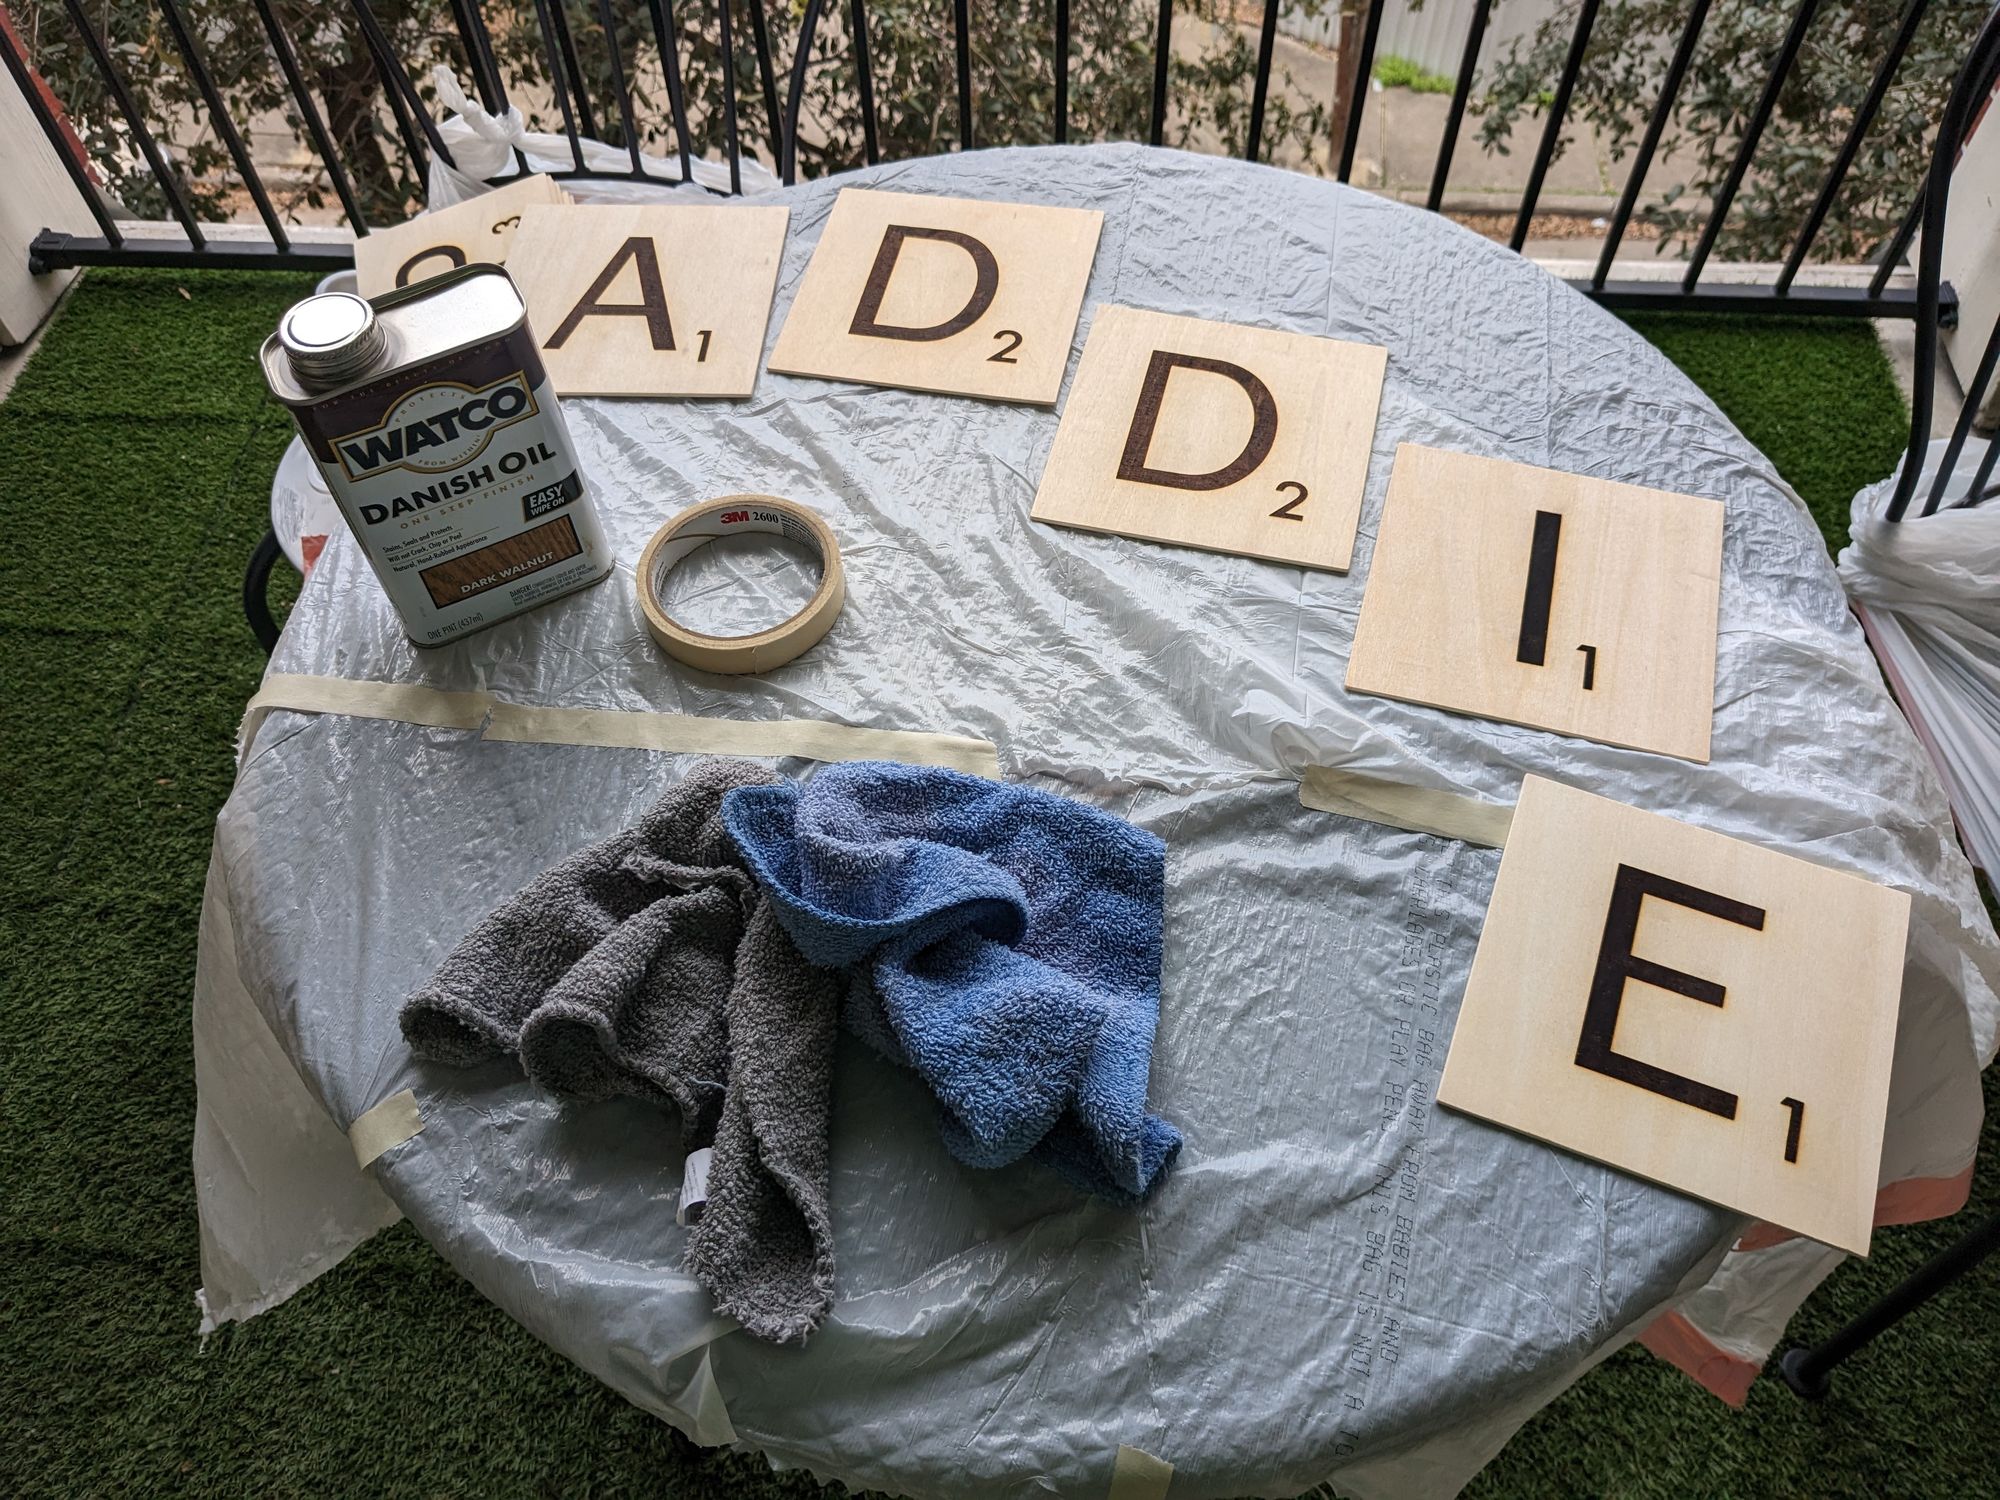
Follow the manufacturer instructions to stain your wood tiles. In the case of the Watco oil I mentioned above, I flooded the cloth with the stain and then rubbed the tile so the oil could be absorbed.

If you are planning on hanging them up, you probably don't need to stain the back. I still stained the back of mine to give it a more "complete" look but you can do what you'd like. Make sure to stain the edges so you don't see any unfinished edges when they are hanging up!
I found that one coat worked for my tiles but if you'd like a darker finish, you can apply more coats as needed in alignment with the manufacturer instructions.
Once all my tiles were stained, I let them be to dry for 24 hours. They were dry to the touch after 15-30 minutes but even after 12 hours they still had some stain come off if rubbed with a paper towel so I gave them 24 hours to be safe.
Step Eight - Arrange and Hang Up Your Tiles
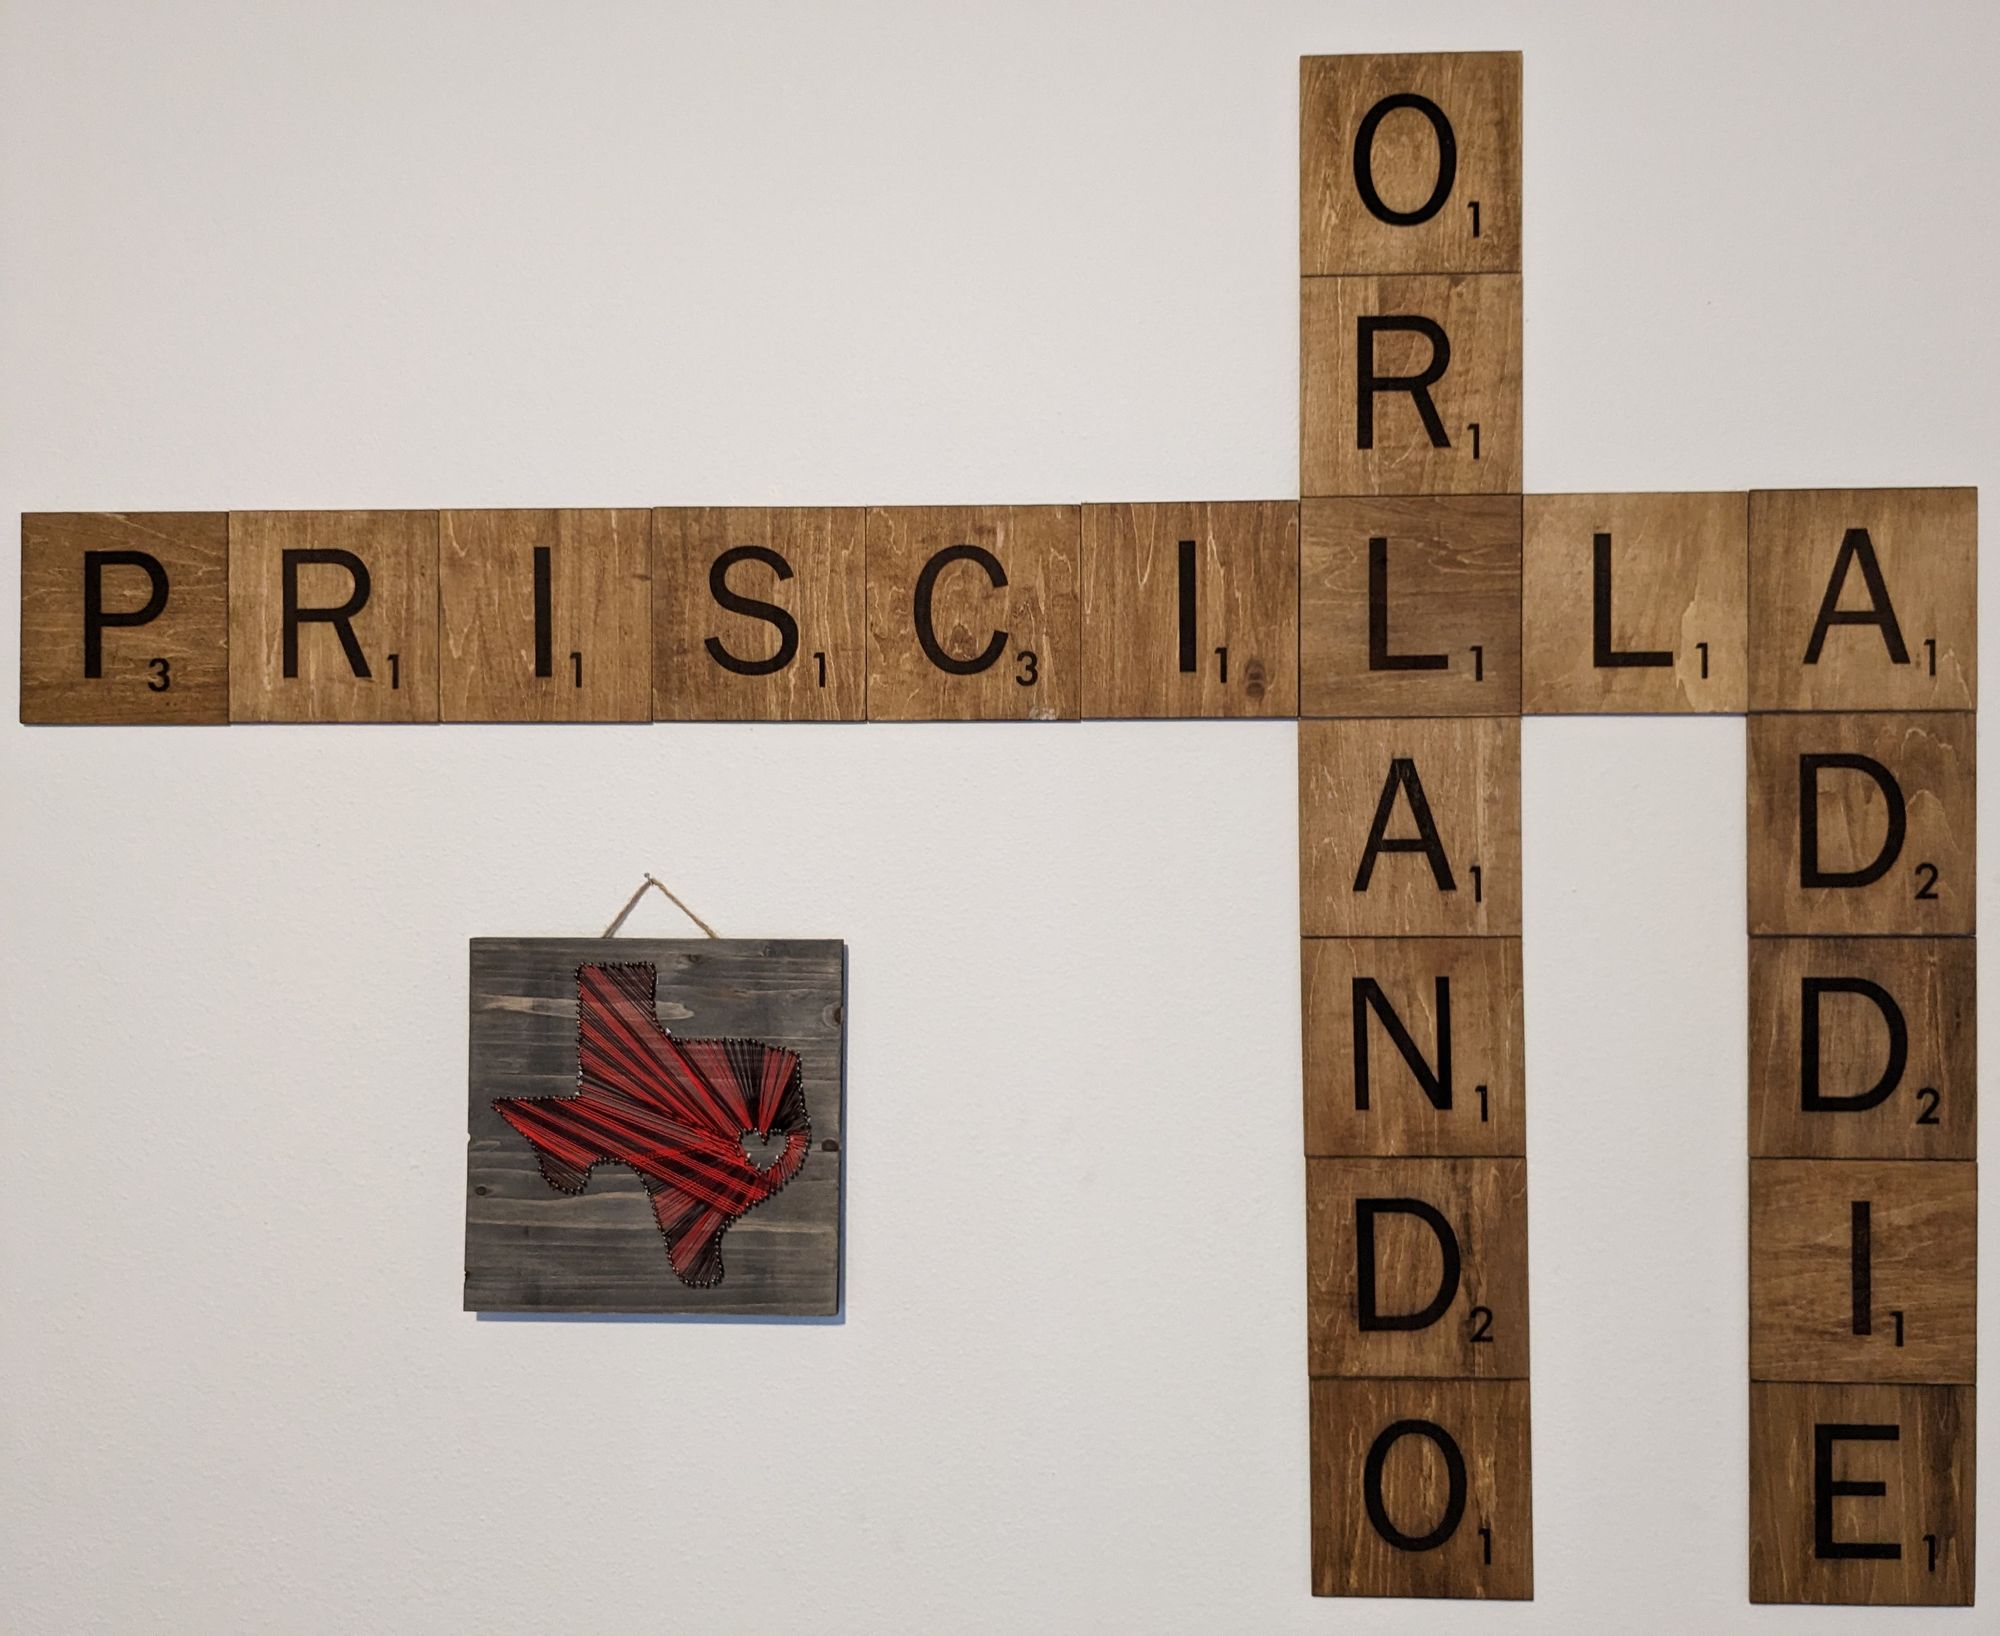
Once you have confirmed your tiles are dry, you can hang them up! Priscilla used these 3M adhesive tiles she had laying around but you could use command hook strips, picture hanging nails, or whatever other hardware you prefer to hang things on your wall.
Conclusion
There you have it! We went over how to import an image, setup a toolpath in Snapmaker Luban, engrave wood, stain our tiles, and then hang up our new scrabble tile wall art! If you don't have a Snapmaker but have been wanting to get one, using this Referral Link can save you 10%.
If you have any ideas or suggestions for future project write ups you'd like to see, feel free to let me know!
Also, if you'd like to join my free newsletter with post updates, and other neat things I come across during my travels through the internet, you can do so here!
Note: This post contains affiliate links, but only for products I have either used or would use. I may earn a commission if you use these links.